


Reer Wound radiant heater 2 in 1 FeelWell
Free Express Shipout!
Delivered on Monday, March 23
Place your order within 18:28
Delivery times for all countries can be found here.
- Free Shipping
- Fast delivery
- Purchase on account
- Easy returns
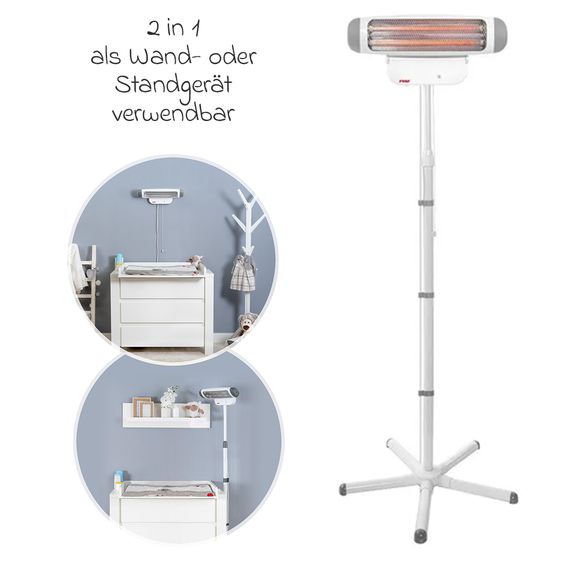
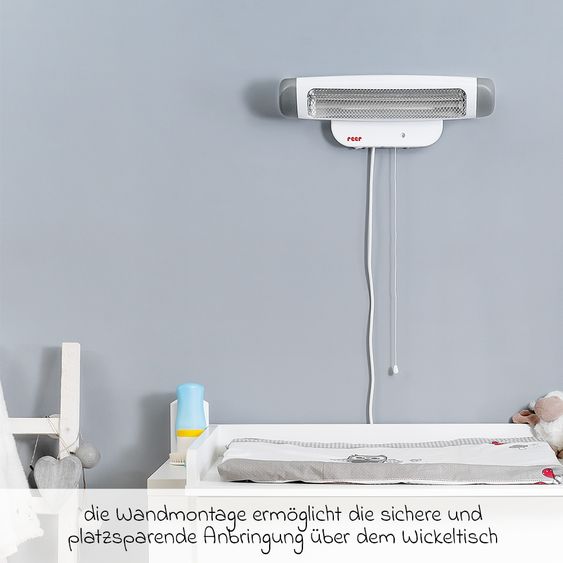
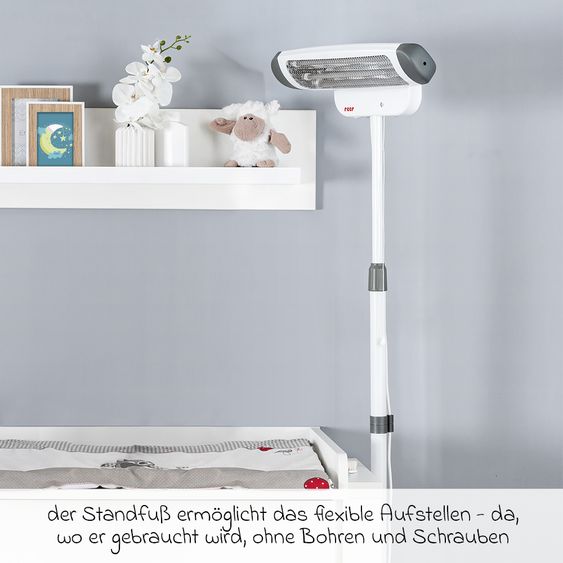
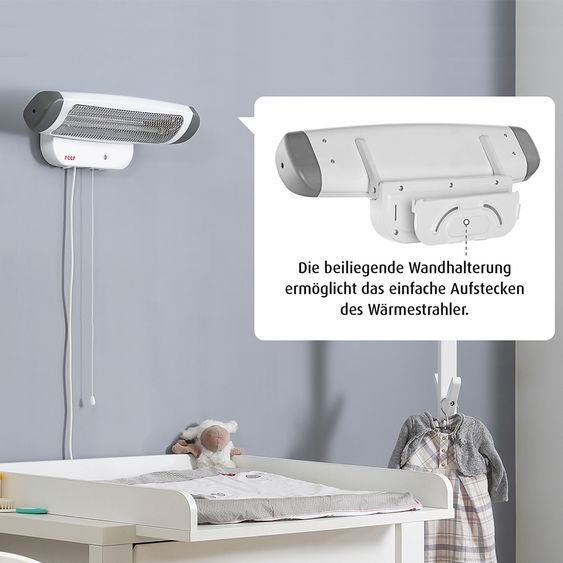
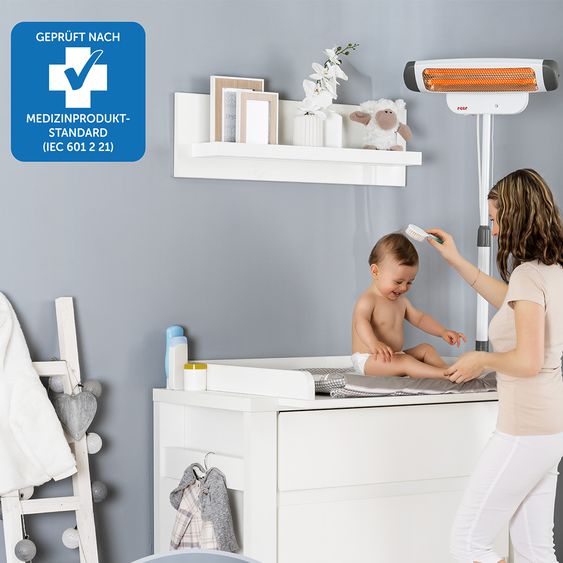
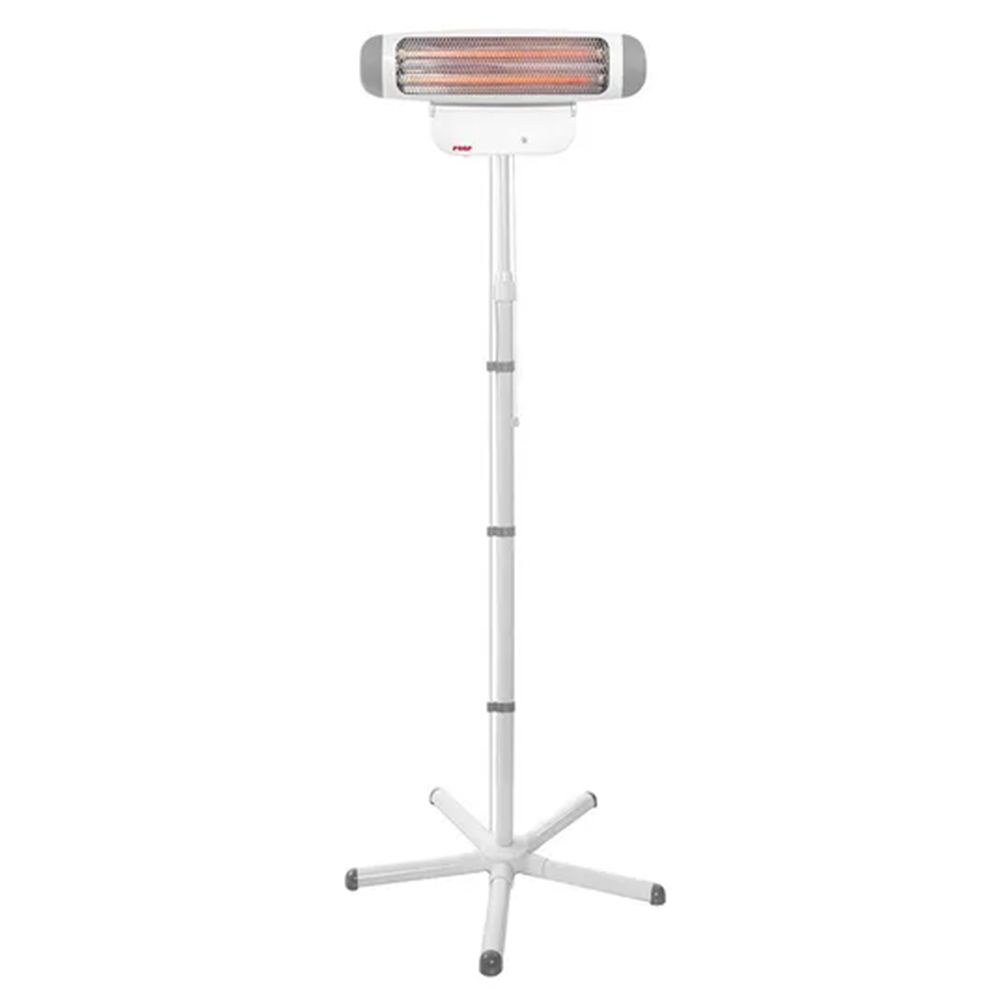
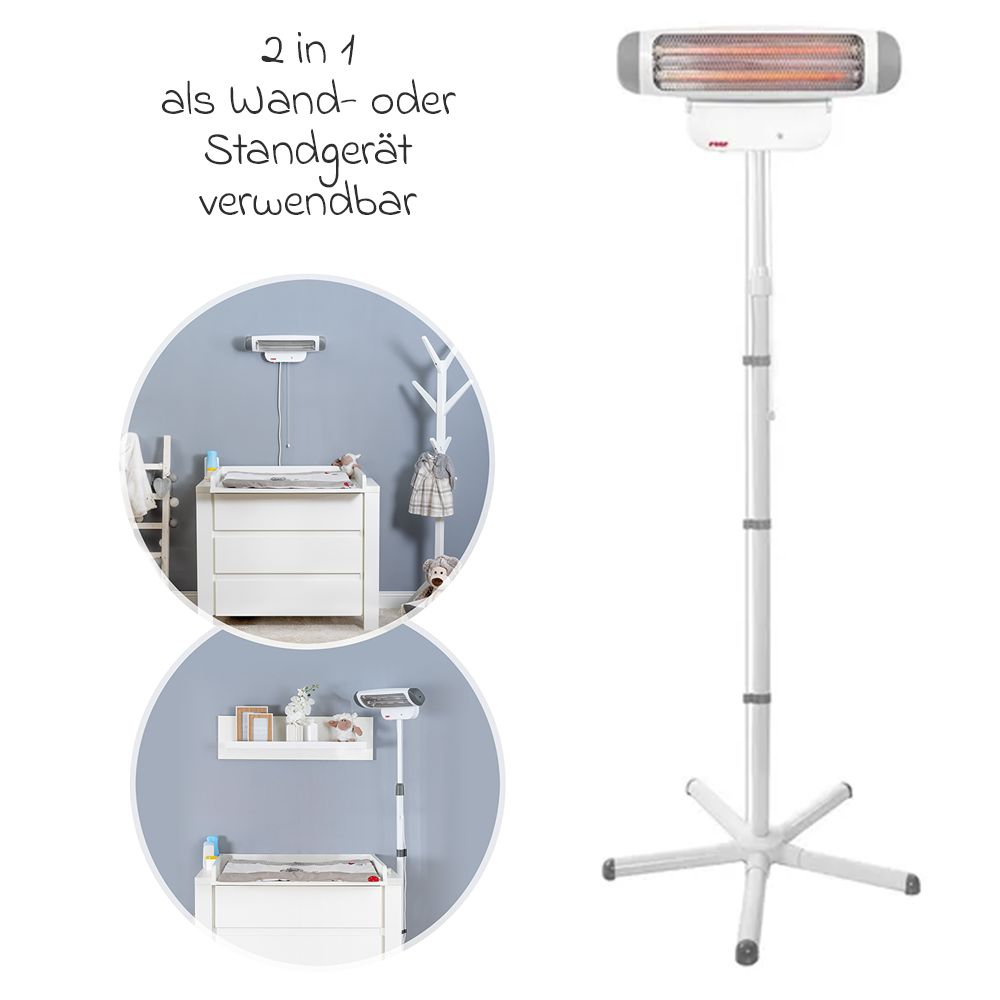
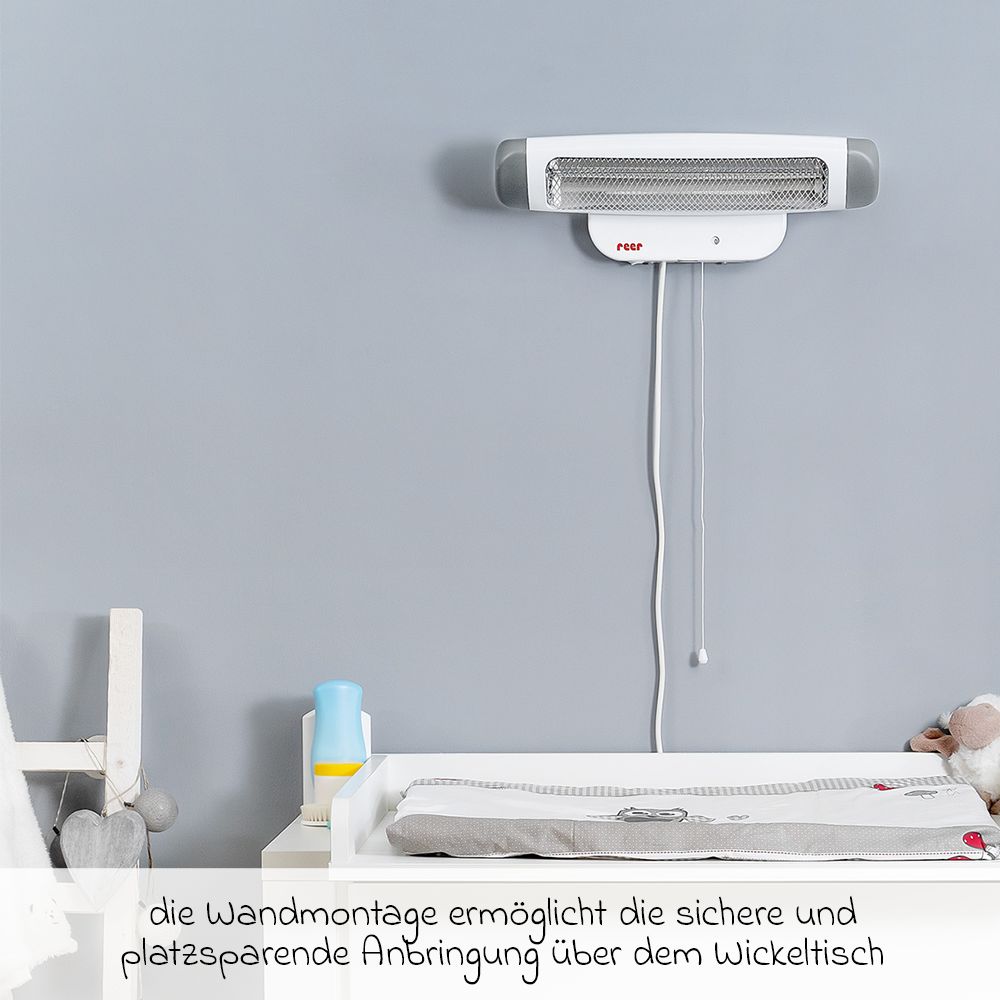
The Wickeltisch-Wärmstrahlhler 2in1 FeelWell from Reer protects your child from cold spots when changing diapers. The spotlight can be mounted directly on the wall by means of a mounting plate or freely positioned in the room with the stand supplied.
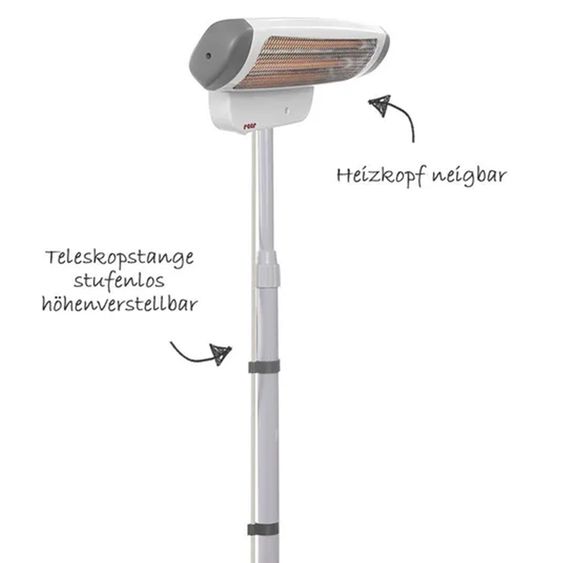
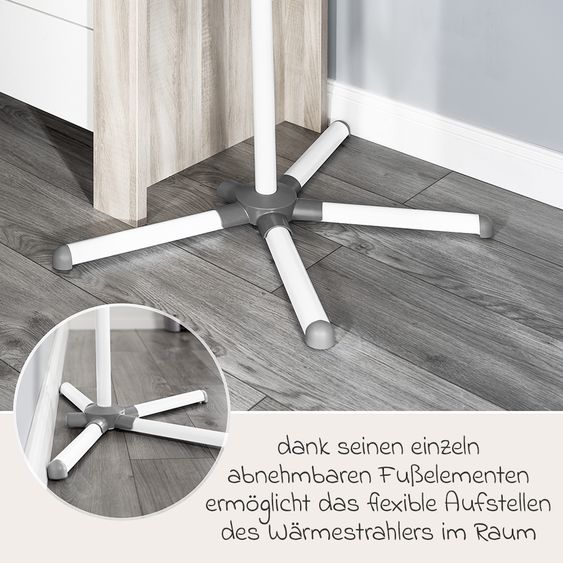
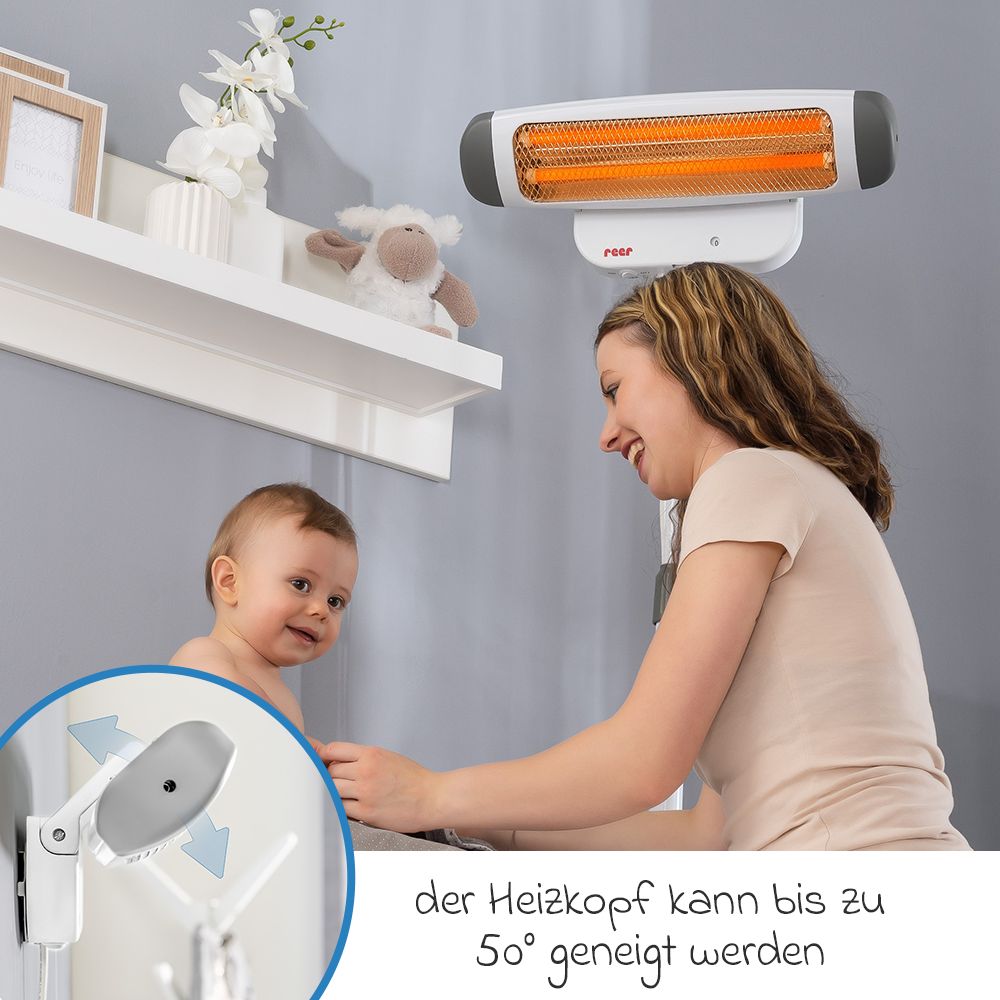
The height of the telescopic rod of the stand can be infinitely adjusted. Thanks to a removable foot element, you can also place the radiant heater with the stand directly on a wall. The heating head can be tilted up to 50° for optimal radiant heat and temperature distribution.
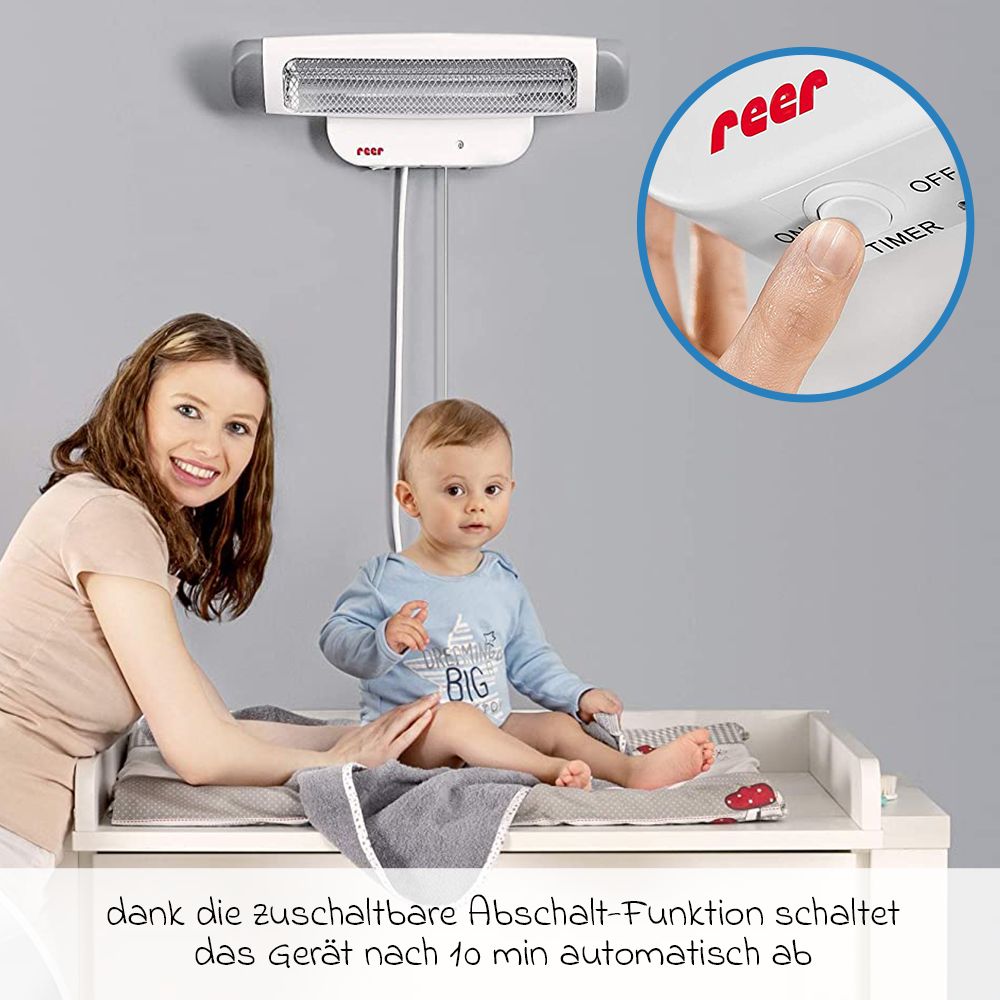
With the switchable automatic switch-off you don't have to worry if the radiator is still switched on after winding. The device switches off automatically after ten minutes. After the automatic switch-off, the device can be switched on again immediately.
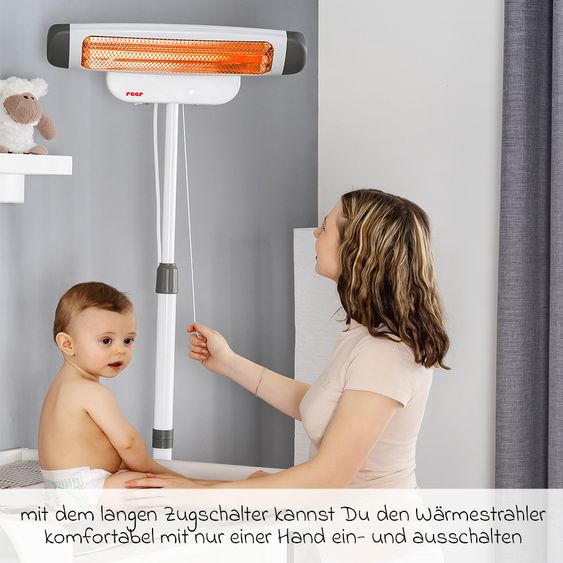
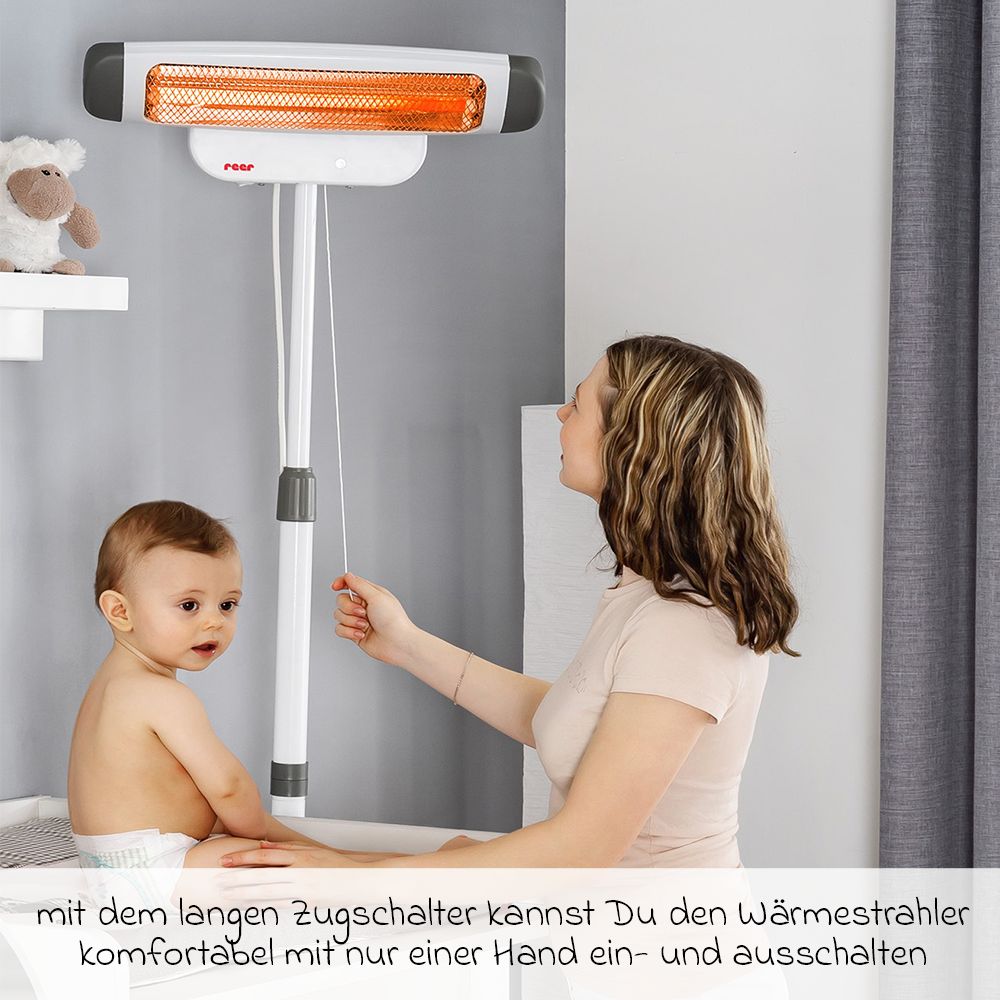
With the particularly easy to use pull switch, you can also switch off the device manually and select between 400 W and 800 W heating levels. An integrated toggle switch-off function switches the unit off immediately if it should tilt.
The changing table lamp has a cable length of 185 cm and is equipped with a protective contact plug. The device is operated with 230 V.
Substrate construction note
Please note that radiant heaters must be installed at the following distances from the device must be set up:
1 meter above the changing unit, 35 cm to the ceiling, 20 cm to side walls and 65 cm to flammable objects (mobile etc.).
Please read the enclosed operating instructions of your radiant heater carefully.
- Power: 400 / 800 Watt
- Li>Dimension spotlight: 54.2 x 22 x 24 cm
- Material: metal, plastic
- Cable length: 185 cm (with safety plug)
- höh> adjustable from 1.55 m to 1.85 m
- Mains voltage: 230 Volt
- Weight: 7.45 kg
| Product group: | 3 |
|---|---|
| Brand: | Reer |
| Color: | Grey, White |
| Shipping Date: | 20.03.2026 |
| Our product code: | 201400009320 |
|---|---|
| Reer product code: | 1928 |
| EAN/GTIN: | 4013283019283 |
WARNING AND SAFETY INSTRUCTIONS
Safety instructions
! Follow the instructions in the manual, otherwise there is a risk that the changing table heat lamp may be damaged. In the worst case, your child, yourself or other people may be endangered or injured.
Safety instructions when putting into operation
• This device is not suitable as a main heating device!
• The device must not be used in small rooms inhabited by persons who cannot leave the room independently.
• Please use the item only for its intended purpose.
• Use the device exclusively for private use; it is not intended for commercial use.
• Improper use leads to loss of warranty claims.
• Do not use the device outdoors.
• Remove all packaging materials before use.
• Check the device for obvious damage before each use. Do not use the device if it or the power cord is damaged.
• Check whether the information on the rating plate matches your mains voltage.
• Do not subject the device to mechanical shocks.
• Do not move the device during operation!
• Repairs may only be carried out by a qualified professional. Improper repairs can lead to significant hazards for the user – this also applies to replacing the power cord.
Warning
Risk of burns / fire hazard:
• Do not cover! Never place anything on the device, even when it is cooled down.
• Observe minimum distances! Position the device at least 65cm away from combustible materials such as wood, textiles, etc. The distance from the heat lamp to the ceiling of at least 35 cm must be strictly observed.
• Only direct connection to the mains socket. Do not connect control devices such as timers, remote controls, etc. to the device.
• Keep the power cord away from all hot parts of the device, including power cords of neighbouring electrical devices.
• Failure to observe these instructions poses a fire hazard! In case of emergency, make sure in advance where the nearest fire extinguisher is located. In case of fire, immediately unplug and extinguish the fire.
Danger
• Do not immerse the device or the power plug in water, other liquids or flammable cleaning agents to avoid the risk of electric shock and/or fire hazard.
• Risk of electric shock! Do not use the device near bathtubs, showers, sinks or other water-filled containers. Never touch the power plug or device with wet hands! Proximity to water remains a danger even when the device is switched off.
Warning:
• The device must never be used unattended.
• The maximum irradiation time must not exceed 15 minutes. Infants with elevated temperature must not be irradiated. There is a risk of body overheating.
• Avoid additional heat radiation, such as sunlight or additional radiation sources, as this can increase your baby’s body temperature.
• The irradiation distance of 100 cm from the heat lamp to the table must be strictly observed.
• This device is not equipped with a room temperature control device. The heating device must not be used in small rooms inhabited by persons who cannot leave the room independently.
• This product is not a toy! Do not allow children to play with the device.
• Risk of strangulation! To prevent strangulation with the power cord, secure cables out of the reach of children.
Caution:
• Risk of injury: Do not touch the device during operation.
• Do not use the device within reach of children. Secure the power cord and ensure it is not accidentally pulled causing the device to fall.
• Persons (including children) who, due to their physical, sensory or mental abilities or lack of experience or knowledge, are not able to use the device safely should not use these devices without supervision or instruction by a responsible person.
C Assembly with stand
A drawing describing this can be found on the first pages.
1. Insert the 5 feet (A2) into the foot socket system (A1).
2. Place the foot cover (A3) over it.
3. Insert the lower plug-in tube (A4) into the opening.
4. Fix the lower plug-in tube from below with the plastic screw (A5).
5. Slide a cable holder (A7) over the lower plug-in tube.
6. Insert the middle plug-in tube (A8) with the slot as shown onto the lower plug-in tube and turn the middle plug-in tube until the holes of both tubes align. Fix the middle plug-in tube with the supplied screw using a Phillips screwdriver.
7. Slide the remaining cable holders over the middle tube and insert the upper plug-in tube (A9) onto the middle plug-in tube. Fix the upper plug-in tube (A9) with the supplied screw using a Phillips screwdriver.
8. Remove the wall bracket from the device.
9. Now place the changing table heat lamp (A10) on the stand and fix it with the plastic screw (A6).
10. Open the grey locking screw of the upper plug-in tube and adjust the desired height of the changing table heat lamp with the telescopic rod. Make sure that the distance to the changing table of 100 cm is maintained. Fix the height by closing the locking screw.
11. Secure the cable in the cable holders.
12. Place the changing table heat lamp in the desired location, taking into account the minimum distances in the room and out of reach of children. Ensure that the stand is stable and on a flat surface.
Note: If fewer than 5 feet are installed (e.g. due to space reasons), the user must otherwise ensure the stability of the changing table heat lamp. Never place the changing table heat lamp freely in the room with fewer than 5 feet! Place the changing table heat lamp in the desired location, taking into account the minimum distances in the room and out of reach of children. Ensure that the stand is stable and on a flat surface.
D Wall mounting
1. Remove the mounting plate from the device as shown.
2. Hold the wall bracket against the wall considering the minimum distances and mark the screw holes with a pencil. Use a spirit level for horizontal alignment.
3. Screw the wall bracket to the wall with the supplied screws and plugs.
4. Insert the changing table heat lamp into the designated slots of the wall bracket.
5. Screw the changing table heat lamp to the wall bracket with previously removed screws (D1).
! Safety instructions for wall mounting:
• The changing table heat lamp may only be fixed and mounted horizontally on the wall. Ceiling mounting is not permitted!
• The changing table heat lamp must not be mounted on wood, plastic or other combustible materials, or below sockets.
E Putting into operation
1. Plug the power plug into the socket
2. Pull the pull cord to switch on the heat lamp. The heat lamp can be set to two heating levels, 400 W (level “1”) and 800 W (level “2”).
3. By pulling the pull cord again, the heating level can be changed or the device switched off again (level “0”).
F Automatic shut-off function
1. To activate the automatic shut-off function, switch the timer switch on the bottom of the device to “ON”. The device switches off automatically after 10 minutes.
2. To switch the device back on after the automatic shut-off, you have 2 options:
• Switch the switch to “Off” or
• Pull the pull cord until the heating level indicator shows “0”. Pulling again to heating level “1” or “2” switches the device back on.
Tip-over shut-off function
The device has an automatic tip-over shut-off function. If the angle exceeds 25° (e.g. when the stand falls over or in ceiling mounting), the device switches off automatically.
Warning: When the device is set upright, the heat lamp switches on automatically again. Troubleshooting
Problem possible causes What to do?
No heat radiation despite heating level indicator “1” or “2”.
• The power plug is not properly inserted.
• The automatic shut-off function (timer) is activated.
• The automatic tip-over shut-off function is activated because the angle of the heat lamp exceeds 25°.
• Check the power plug.
• Switch the “Timer” to “Off” or switch the device off and on again by repeatedly pulling the pull cord.
• Ensure that the heat lamp is mounted horizontally and fixed on the wall or that the stand is upright.
Cleaning, maintenance
Before cleaning, make sure the device is switched off and cooled down (unplug). Clean the surface with a dry or slightly damp cloth. Have the reflector and heating rods cleaned only by a professional. The device is not waterproof and must not be immersed in water or exposed to direct moisture. This product requires no special maintenance. Repairs to the device may only be carried out by a professional.
Environmental protection notes
Electronic waste is a raw material and must not be disposed of in household waste but must be taken to a collection point for recycling electrical devices. Consumers are legally obliged to dispose of electrical waste properly. By reusing, recycling or other forms of disposal of old devices, you make an important contribution to protecting our environment. Please ask your local authority for the appropriate disposal site. The adjacent symbol indicates the obligation for proper disposal.
Warranty
Please keep the purchase receipt, user manual and article number. Warranty claims or claims arising from warranty promises are to be handled exclusively with the retailer. All technical data, information and properties of the product described in this work have been compiled to the best of knowledge and correspond to the status at the time of publication. The information provided by reer should be correct and reliable. However, reer assumes no liability for possible errors in this document and reserves the right to make changes to the product design or specifications without prior notice.
Copyright notice
Reproduction and distribution of information from this copyright-protected work in any form or by any means, graphic, electronic or mechanical, by photocopying, recording on tape or storing in a data retrieval system, even in part, require prior written permission from reer.
| Our product code: | 201400009320 |
|---|---|
| Reer product code: | 1928 |
| EAN/GTIN: | 4013283019283 |
Click to load this video from the YouTube servers. For details see our privacy policy.